
Minecraft build guide
Minecraft Beacon: Recipe, Pyramid Levels, Range, and Effects
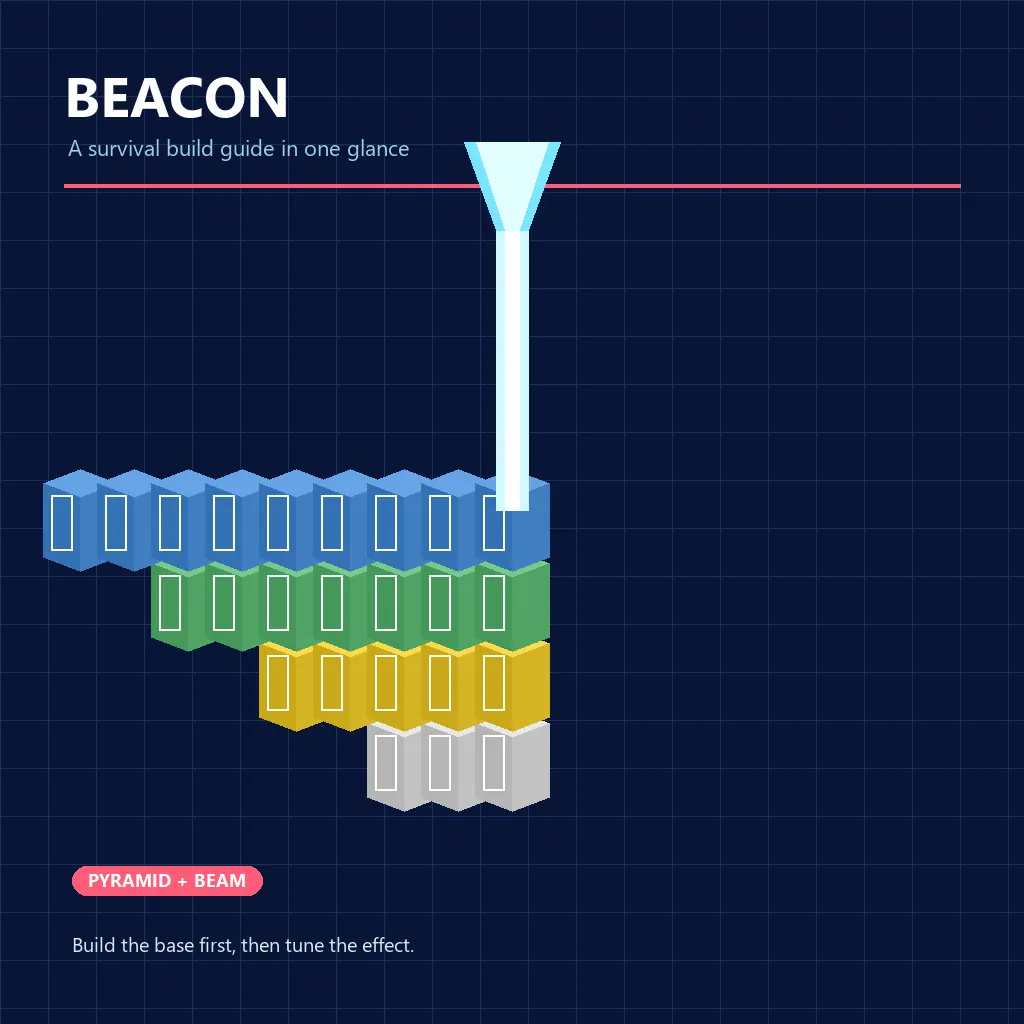
A Minecraft beacon is easiest to plan when you separate the recipe, the mineral pyramid, and the power menu. This guide gives you the exact craft ingredients, the four base sizes, the range each level provides, and a short activation test you can repeat in Java or Bedrock.
The diagrams on this page are original editorial concept graphics, not official gameplay screenshots. Beacon behavior can change with an edition or release, so check your in-game suggestions before a large survival build.
Quick answer
What Do You Need to Make a Minecraft Beacon?
The Minecraft beacon recipe uses 5 glass, 3 obsidian, and 1 Nether Star. The Nether Star comes from defeating the Wither, so a beacon is a late-game utility block rather than an early starter item. Put the ingredients in a crafting table with the glass across the top, the Nether Star in the center, and obsidian across the bottom.
Crafting the block is only the first half. To activate it, place the beacon above a pyramid made from iron, gold, emerald, diamond, or netherite blocks. The materials can be mixed, and the pyramid can be built from one block type or several. A full four-level pyramid contains 164 mineral blocks, so many players start with level one and expand after the first power test.
A working beacon also needs a clear path to the sky. Opaque blocks above the beacon stop the beam and prevent activation; transparent blocks such as glass can keep the beam visible. Once the beam is active, open the beacon interface, insert one accepted payment item, choose a primary power, and press the confirmation control. The payment item is consumed when the power is set or changed.
Recipe
5 glass, 3 obsidian, and 1 Nether Star craft the beacon block.
Base materials
Iron, gold, emerald, diamond, and netherite blocks are valid pyramid materials and may be mixed.
Range
The four levels reach 20, 30, 40, or 50 blocks from the beacon, measured by the active level.
Payment
Use an iron or gold ingot, emerald, diamond, or netherite ingot to select or change a power.
Activation sequence
How to Build and Activate a Minecraft Beacon
Build the smallest testable version first. The order below prevents a hidden roof, incomplete base, or unconfirmed power choice from being mistaken for a crafting problem.
1. Craft the beacon
Collect five glass, three obsidian, and a Nether Star. In the crafting table, place the glass in the top row, put the Nether Star in the center, and fill the bottom row with obsidian. If the recipe does not appear, check that you are using a crafting table and that the Nether Star is in the center slot.
2. Pick a visible test site
Place the first beacon somewhere you can see from your base. A flat roof, hilltop, or marked underground room with a glass shaft makes the beam easy to inspect. Leave space around the future pyramid so you can add layers without moving the beacon.
3. Build a valid pyramid
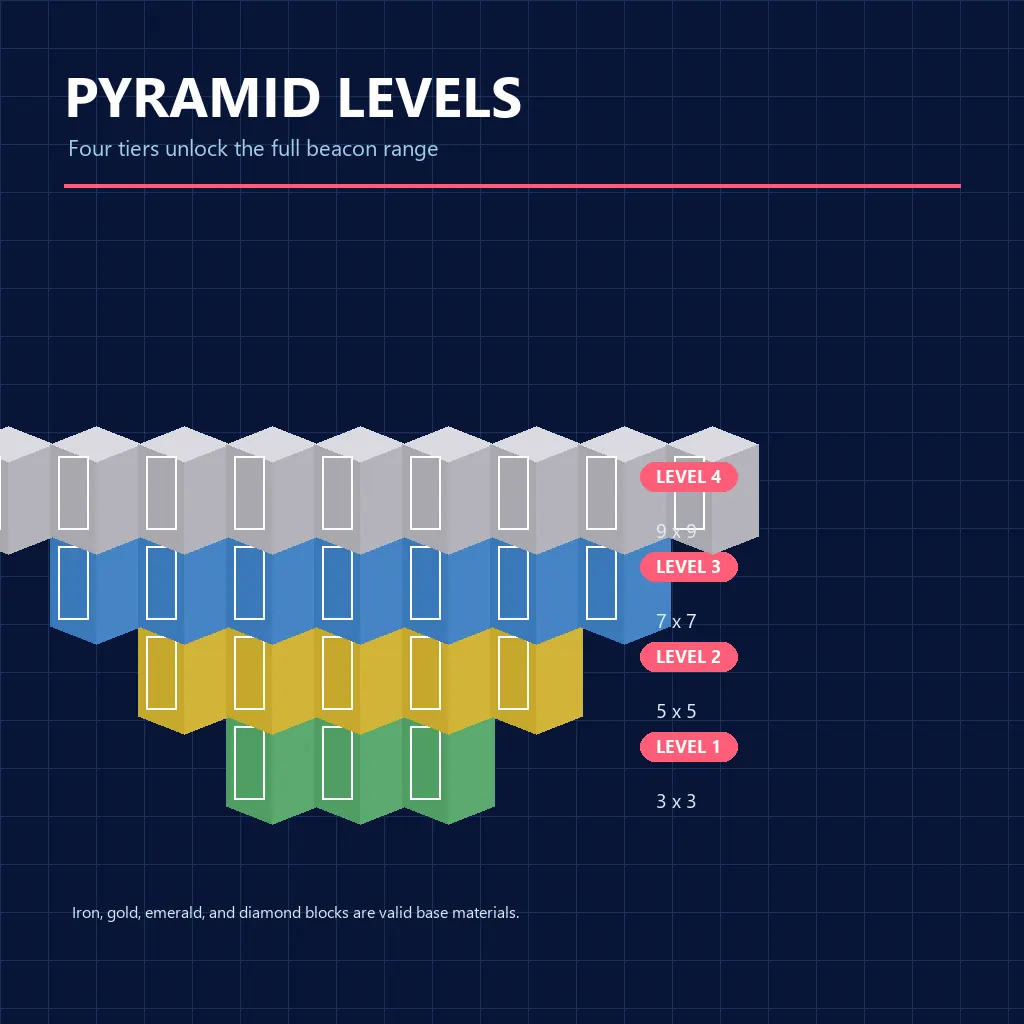
Use iron, gold, emerald, diamond, or netherite blocks. Start with a 3 by 3 layer directly under the beacon, then add the 5 by 5, 7 by 7, and 9 by 9 layers if you want the full range and power choices. Every layer must be centered on the beacon.
4. Place the beacon and clear the beam
Put the beacon on the center block of the top layer. Look upward for stone, dirt, a build ceiling, or another opaque block. Remove the obstruction or replace the ceiling with a transparent section. If the beam is visible but the menu is disabled, inspect the pyramid before rebuilding the recipe.
5. Select a power
Open the beacon interface and insert one valid payment item. Level one offers Speed or Haste; higher levels add Resistance, Jump Boost, and Strength. At level four, you can upgrade the primary power to level II or choose Regeneration as the secondary power, depending on the interface shown by your edition.
6. Test range and color
Walk away from the beacon in each direction until the effect icon disappears, then return inside the active area. Use a stained glass block or pane above the beacon if you want a colored beam, and test the color from several angles. Keep the effect test separate from decorative blocks so a later change is easy to diagnose.
Pyramid check
Use the Four Pyramid Levels to Plan Cost and Range
The most common beacon planning mistake is counting only the top layer. Each level includes every layer beneath it. A level-two base is a 5 by 5 square plus the 3 by 3 square below it, for 34 blocks total. A full level-four base is 9 by 9, 7 by 7, 5 by 5, and 3 by 3, for 164 blocks. The pyramid graphic keeps those layers visible so you can budget resources before mining or trading.
The range numbers are horizontal distances from the beacon, not a promise that every block in a circle will be safe. Vertical movement, terrain, and the time between effect checks still matter in a real build. Treat 20, 30, 40, and 50 blocks as planning limits, then walk the boundary in your own edition and release.
You do not need to rebuild the beacon block when upgrading the base. Add a centered layer underneath, reopen the interface, and choose a power again if the new level unlocks a stronger option. If the range does not change, count the layers and verify that every block is a full mineral block rather than an ingot, ore, slab, or decorative variant.
Cost and range table
Minecraft Beacon Pyramid Levels at a Glance
Use the table to choose a practical first build. The range values are horizontal planning distances and the block total includes all layers.
Power menu
Choose the Effect That Matches the Job
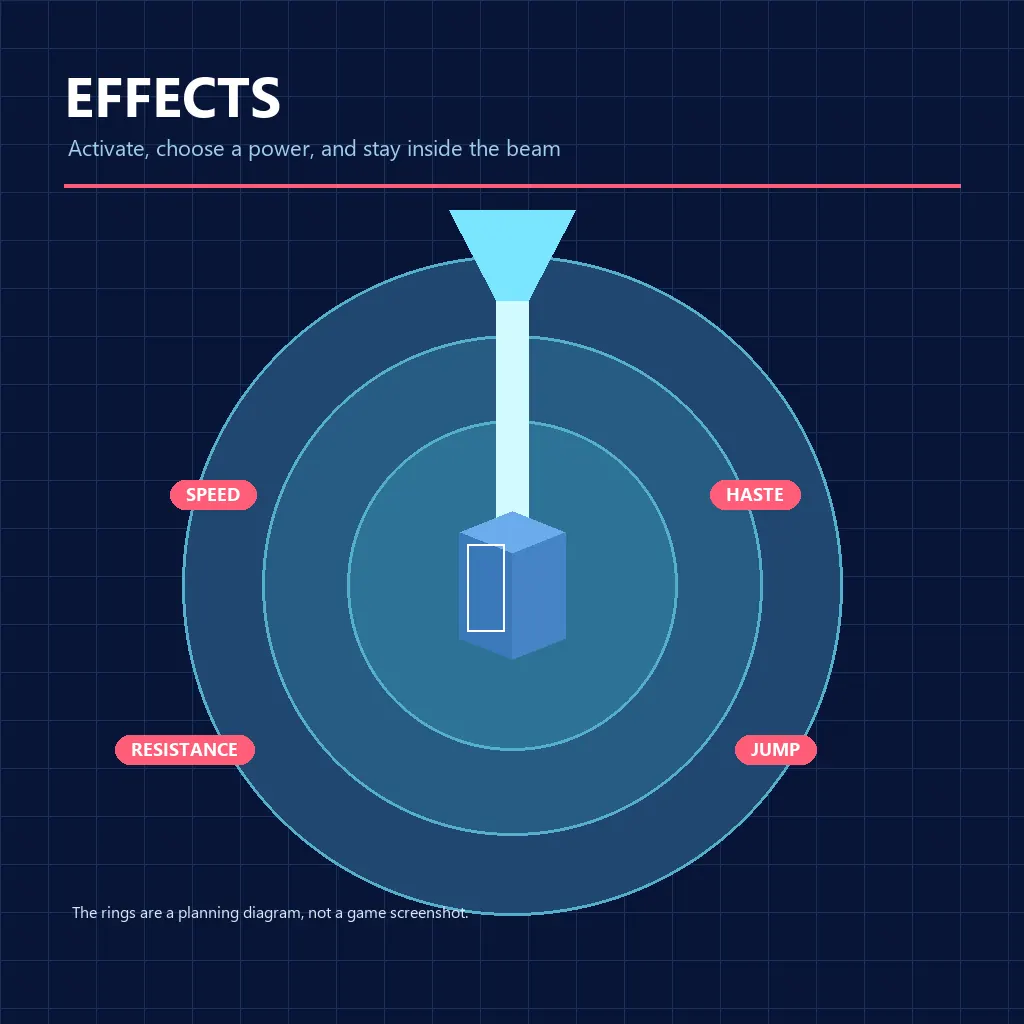
Speed is useful around a base, Haste helps with a large mining or clearing project, Resistance supports dangerous work, and Jump Boost changes how quickly you cross uneven terrain. Strength is a combat choice. Regeneration is a level-four secondary option. The best power is the one that removes the bottleneck in the task you are doing, not automatically the rarest effect.
A beacon does not give every power at the same time. The interface shows which primary and secondary options are unlocked by the current number of layers. Insert a payment item, select the power, and confirm. When you want a different power later, open the interface again and pay another accepted item. Keep a few ingots or emeralds in a chest beside the beacon so a change is not blocked by a long trip.
The effect rings in the diagram are a planning aid, not an exact game map. The active area follows the beacon's level and checks the player position as they move. If you are building a quarry, trading hall, or arena, put a marker at the intended boundary and test the effect at floor level, on stairs, and at the highest work platform.
Troubleshooting
Why Is My Minecraft Beacon Not Working?
Check one layer at a time. A beacon that will not activate usually has a blocked beam, an incomplete pyramid, or an unconfirmed interface choice.
An opaque block is above it
Stone, dirt, wood, or a solid roof can stop the beam. Remove the block or replace the ceiling section with transparent glass and check again.
The base uses the wrong blocks
Ore blocks, ingots, slabs, stairs, and decorative lookalikes do not replace full iron, gold, emerald, diamond, or netherite blocks. Count each layer from the center outward.
The pyramid is off-center
The beacon must sit above the center of the top layer. A shifted 3 by 3 or a missing corner breaks the expected level, even when the base looks nearly complete.
The menu choice was not confirmed
Insert a valid payment item, select an unlocked power, and press the interface confirmation control. Seeing a beam alone does not mean an effect has been applied.
You expected every power at level one
Higher effects and level II options require more layers. Expand the pyramid, reopen the menu, and check the power list shown in your edition.
Keep building
Related Minecraft Guides
Use these pages for the edition, version, and adjacent build decisions that affect a beacon project.
Java vs Bedrock
Compare commands, mechanics, and version assumptions before following a beacon tutorial.
Compare editionsMinecraft Enchantments
Plan Haste, mining tools, and combat equipment around the job your beacon will support.
Review enchantmentsMinecraft Versions
Check current release notes before copying a design into a long-running survival world.
Open version notesPrimary references
Verify Version-Sensitive Details
The recipe and broad mechanics are stable, but interface labels and edition behavior can change. Use current first-party or community references when a release update affects your world.
Minecraft official site
Use the official Minecraft news and update pages to check release context before a large build.
Open official articlesMinecraft Wiki: Beacon
Community-maintained reference for recipe, pyramid levels, power options, range, and beam coloring.
Read the beacon referenceMinecraft Wiki: Wither
Reference for the Nether Star source and the preparation needed to obtain it.
Review the Wither guideFrequently asked questions
Minecraft Beacon FAQ
What is the Minecraft beacon recipe?
Craft a beacon with 5 glass, 3 obsidian, and 1 Nether Star. Put the glass in the top row, the Nether Star in the center, and obsidian in the bottom row of a crafting table.
How many blocks do I need for a full beacon?
A full four-level beacon pyramid uses 164 mineral blocks in total: 9 on the first layer, then 25, 49, and 81 for the additional layers. The beacon block sits on the center of the top layer.
What blocks can power a Minecraft beacon?
Full blocks of iron, gold, emerald, diamond, and netherite can form the pyramid, and the materials can be mixed. Ingots, ore, slabs, stairs, and decorative variants do not count.
How far does a level-four beacon reach?
A level-four beacon has a planning range of 50 blocks horizontally from the beacon. Walk the boundary in your own edition and version because terrain and movement still affect how the effect feels in practice.
Why is my beacon beam visible but the power is not active?
Check that the pyramid is centered and complete, the beam has a clear path to the sky, and you inserted a valid payment item and confirmed a power in the interface.
Can I mix iron, gold, emerald, diamond, and netherite blocks?
Yes. The beacon checks whether each layer is made from an accepted full mineral block; it does not require one material for the whole pyramid.
How do I change a beacon effect?
Open the beacon interface, insert another accepted payment item, choose an unlocked primary or secondary power, and confirm the change. The pyramid does not need to be rebuilt.
Can glass color a beacon beam?
A stained glass block or pane above the beacon can tint the beam. Test the arrangement from outside the build, and remember that opaque blocks still stop the beam.