
Minecraft villager guide
How to Breed Villagers in Minecraft: 7 Steps That Work
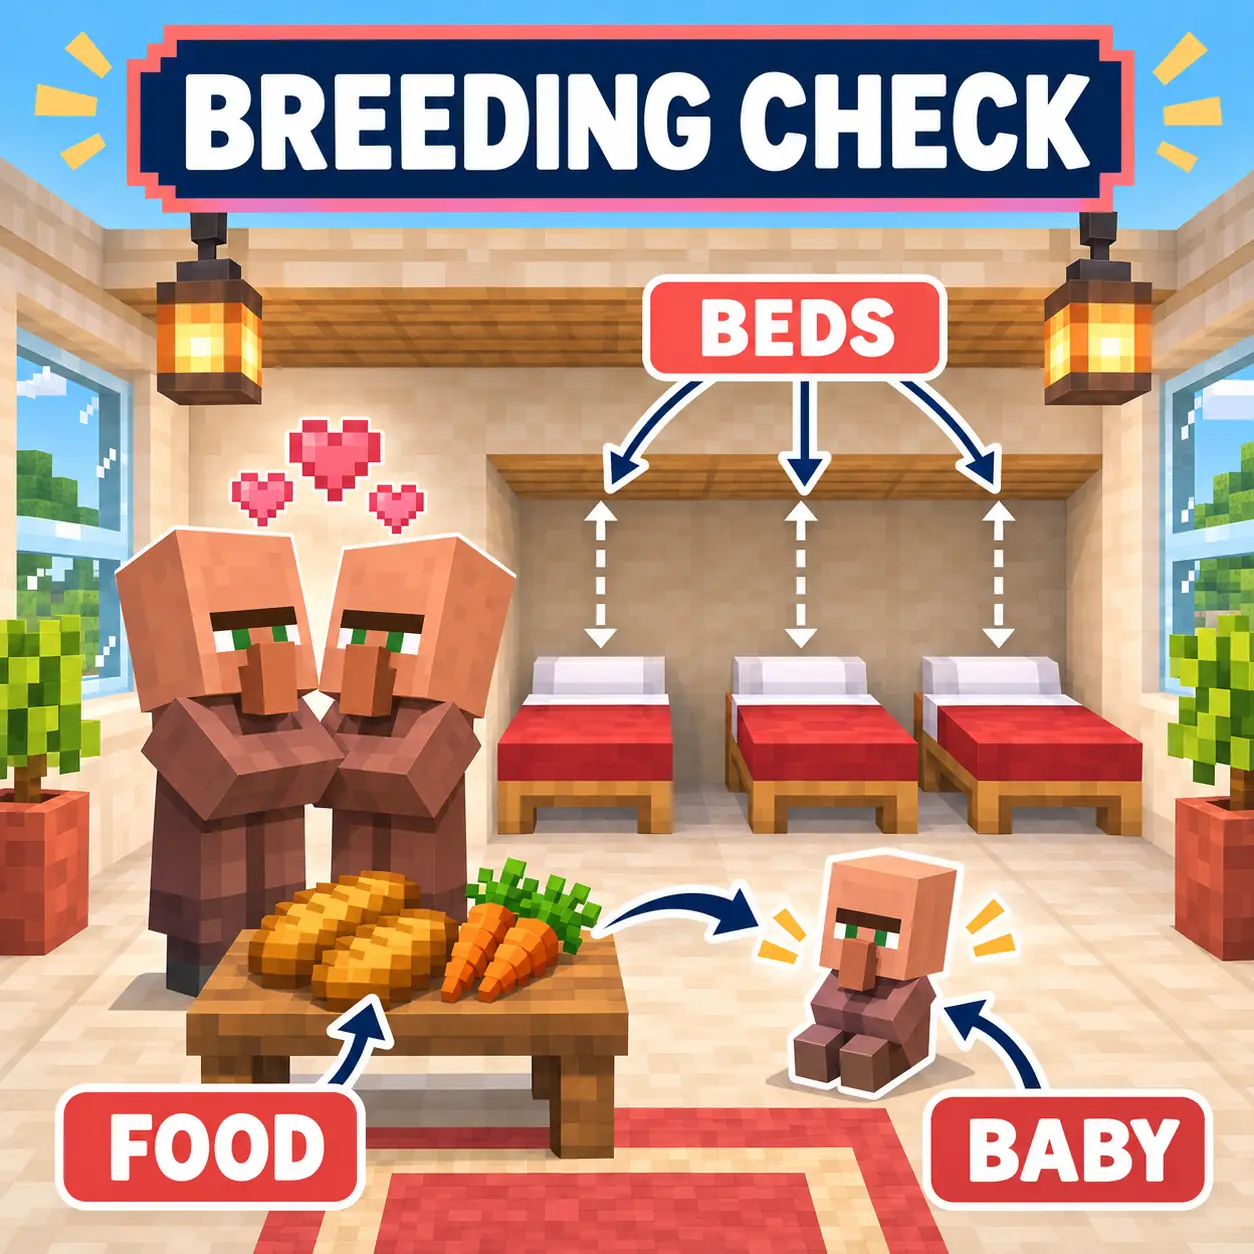
The reliable way to breed villagers in Minecraft is simple: place two adult villagers in a safe room, give them enough food, provide an extra reachable bed for the baby, and leave clear headroom above the beds. This guide turns that short answer into a testable Java and Bedrock workflow.
The diagrams are original editorial illustrations, not official gameplay screenshots. Edition behavior and village rules can change, so test the smallest breeder in a copied world before connecting it to a trading hall or iron farm.
Quick answer
What Do Villagers Need to Breed in Minecraft?
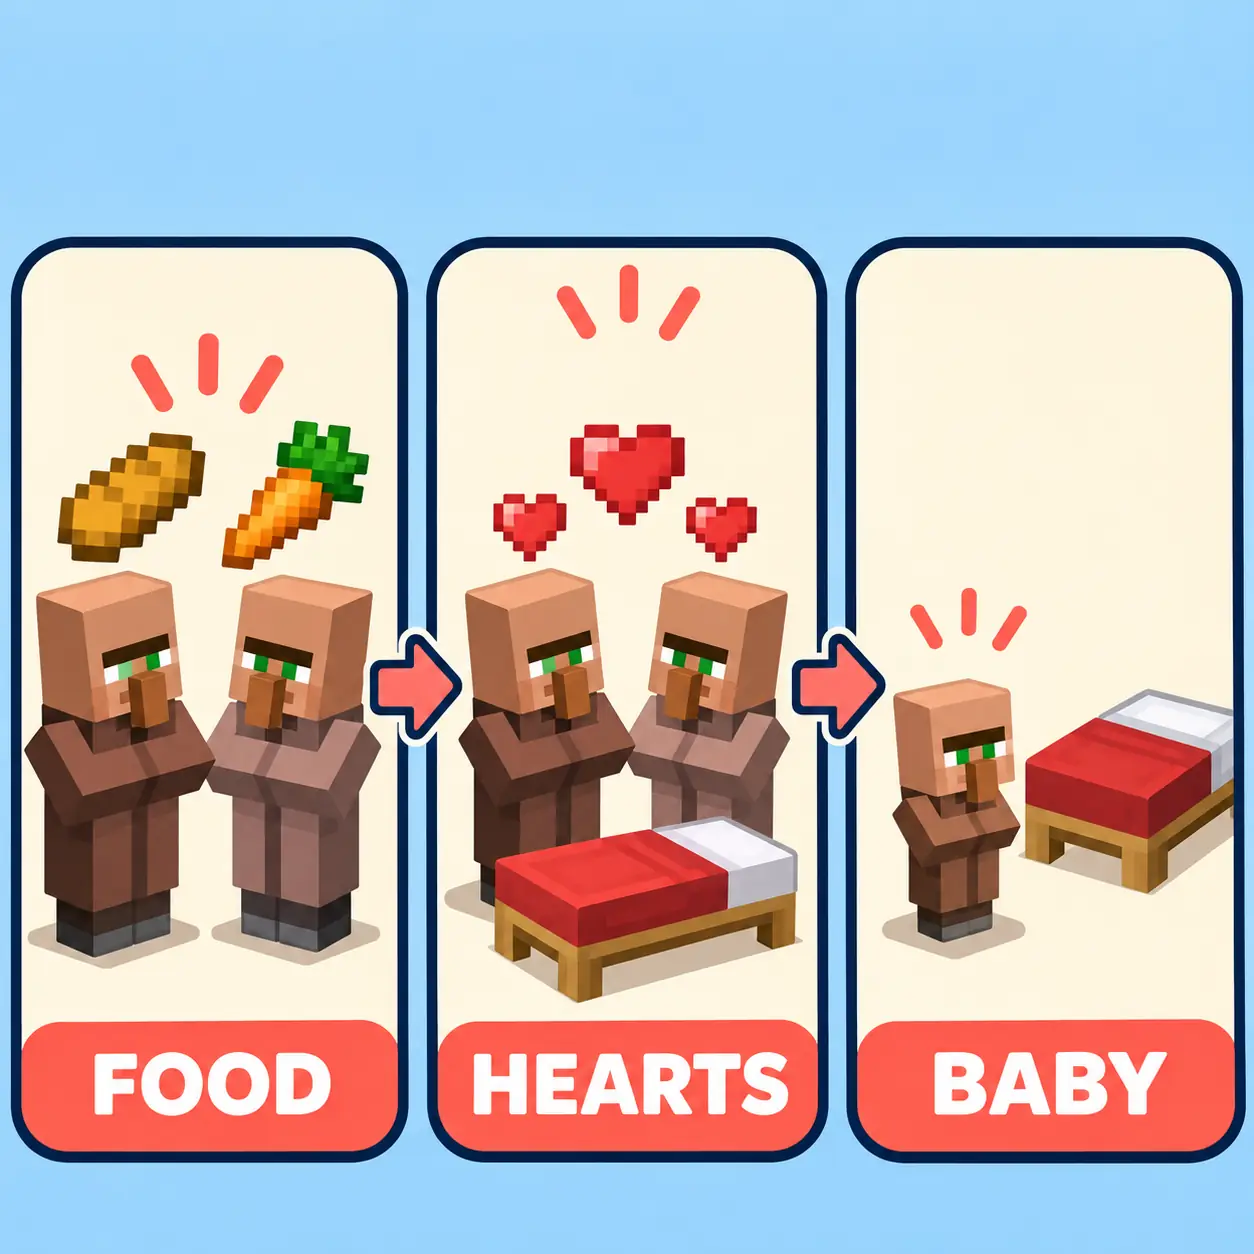
To breed villagers, use two adult villagers, give each enough valid food, and provide at least one extra bed that a baby can claim. A practical starter room has two adults, three beds, a solid floor, a clear route to the beds, and at least two blocks of open space above the bed pillows. Bread, carrots, potatoes, and beetroot can make villagers willing to breed. Throw the food so both adults can pick it up, then watch for heart particles.
The extra bed matters because the game checks whether the new villager has a valid sleeping place. A bed blocked by a solid ceiling, trapped behind a wall, or already claimed by another villager may not count. Keep the breeder separate from a village or trading hall while testing. A nearby bed or workstation can make it hard to tell which villager claimed which point of interest.
Villagers do not create babies continuously. After a successful attempt, the adults have a cooldown, and the baby needs time to grow. If hearts appear but no baby arrives, check bed validity first, then wait for the cooldown. If no hearts appear, check food sharing, adult status, pathing, and whether the villagers can reach the beds. This order saves time because it separates willingness from bed validation.
Two adults
Use adult villagers. Babies, nitwits, and villagers trapped behind an unreachable route cannot complete the same breeding test.
Enough food
Bread, carrots, potatoes, and beetroot are practical choices. Give both villagers enough items instead of dropping one stack in a corner.
One spare bed
Start with three beds for two adults. The spare bed must be reachable, unclaimed, and clear above its pillow.
A controlled test
Build the smallest room first, then connect the working breeder to a trading hall or iron farm after the first baby survives.
Breeding sequence
How to Breed Villagers in Minecraft Step by Step
Use this seven-step loop in a copied world. Change one variable at a time so a failed attempt tells you what to fix.
1. Choose a quiet test location
Pick a small room away from a natural village, extra beds, and an active trading hall. Light the room, close escape routes, and leave a service opening so you can throw food and inspect the villagers. A flat floor makes bed distance and headroom easier to check. Keep the first test close enough to your base that you can return after the baby grows, but do not connect it to a larger village until the basic cycle works.
2. Move in two adult villagers
Transport villagers one at a time by boat, minecart, or a safe path. Close the door before moving the second villager so neither can wander away. A villager that is already a baby cannot breed, and a nitwit can live in the room but cannot take a job later. For the breeding test, the important detail is two adults with enough floor space to stand and reach the food and beds.
3. Place three beds with clear headroom
Put two beds aside for the adults and one extra bed for the baby. Leave open blocks above the pillow end and keep the approach unobstructed. Do not place a solid slab, trapdoor, or low ceiling where the game expects the villager to stand or sleep. If your room has a roof, make it high enough that the bed is not covered by a cramped block pattern. Count the beds in the test room before adding more villagers.
4. Give both villagers breeding food
Use bread, carrots, potatoes, or beetroot. Throw the food where both villagers can pick it up, then watch their inventory behavior and heart particles. A single item that lands on a wall may feed nobody. If one villager collects everything, add a second handful and keep the adults apart only long enough to confirm that both have access. Do not use wheat, seeds, or random crops as a substitute for the accepted breeding foods.
5. Wait for hearts and a baby
When both adults are willing, heart particles usually appear. Keep the room unchanged while the game checks the spare bed. A baby villager should appear if the bed is valid and available. If hearts turn into angry particles, do not immediately rebuild the room: verify the spare bed, headroom, and path to the pillow first. After a successful birth, give the adults time before trying again.
6. Separate the baby from the test cell
Move the baby only after confirming that the breeding cycle worked. A water stream, fence gate, boat, or minecart can help with transport, but keep the adult pair safe and leave their beds in place while testing. If the baby is destined for a trading hall, move it through a controlled route and link the workstation only after it grows. This prevents transport problems from being mistaken for a breeding problem.
7. Scale only after one complete cycle
Let the baby grow, repeat one breeding attempt, and check that the adults can still reach their beds. Only then duplicate the room or connect it to a villager trading hall or iron farm. Record your edition and game version beside the design. A Java breeder and a Bedrock breeder can share the same broad idea while differing in village linking, pathing, and practical layout details.
Setup checklist
Check the Bed, Food, and Space Before Changing the Design
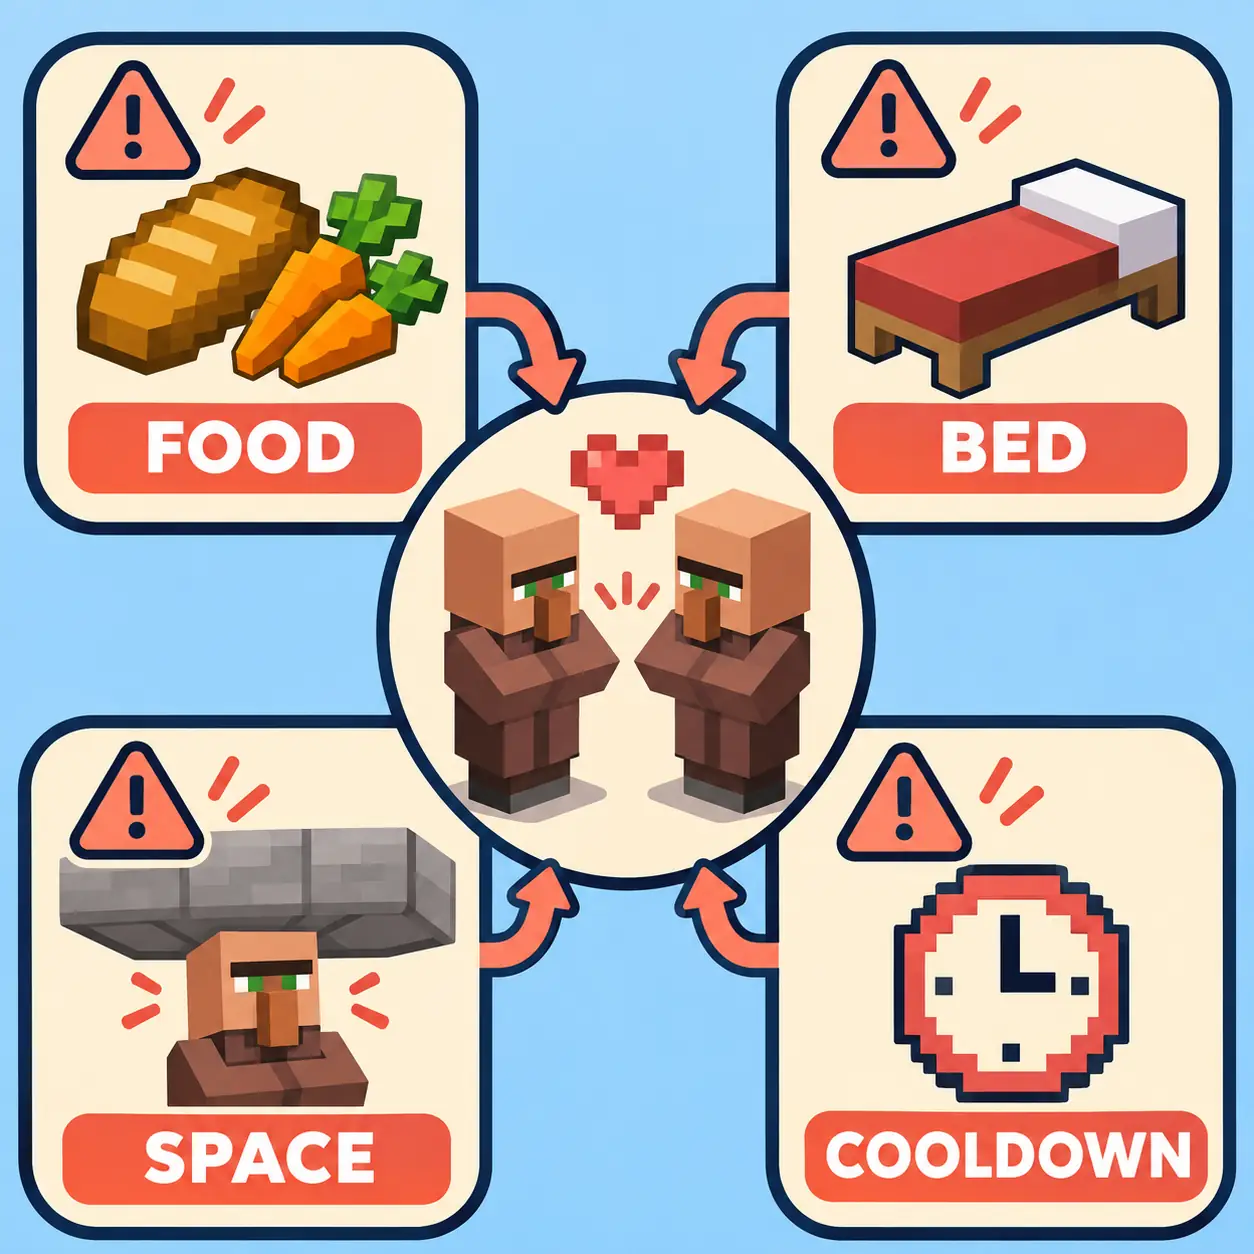
The most useful breeding checklist is a small table, not a giant list of village facts. First confirm two adults. Next confirm that both can pick up accepted food. Then count the beds and inspect the spare bed from the villager's point of view. A bed can look open to a player while still failing the game's path or headroom check. Keep the room simple until a baby appears.
Bedrock and Java both use beds and willingness, but the surrounding village and point-of-interest behavior is not identical. A nearby village, workstation, or claimed bed can change what you observe. That is why this guide recommends an isolated test room and a copied world. Once the room works, connect it to your real base and solve transport or job-site linking as separate tasks.
The official Minecraft site is the best place to check release context, while the Minecraft Wiki is useful for detailed villager and breeding mechanics. Both are references rather than a promise that every future version will behave the same. If an update changes breeding, record the edition, version, and exact symptom before rebuilding a working layout.
Requirements table
Minecraft Villager Breeding Checklist
Use the table before you add more villagers. The action column keeps each check observable in a small test room.
Java and Bedrock
What Changes Between Java and Bedrock Villager Breeding?
The core breeding idea is shared: two adults, accepted food, and a valid spare bed. The practical differences appear around the room. Java and Bedrock can evaluate village points of interest, pathing, and nearby beds differently, so a design copied from a video may need a larger aisle or a more isolated test cell. Start with the requirements table, then adjust the room for your edition.
In Java, a compact breeder can be easy to test when the adults, beds, and food are visible. In Bedrock, nearby villagers and village points of interest can make a bed appear claimed by a different villager. If the room works once and then stops after you add a trading hall, remove the new beds and workstations, test the original pair again, and add the surrounding systems one at a time.
Transport is another boundary. Boats and minecarts are useful in both editions, but terrain, portals, and collision behavior can change the route. Move one baby at a time, keep a backup world, and do not connect a breeder to a trading hall until you have verified a full birth and growth cycle. For the next step, use the site guide on villager trading halls for workstation linking rather than mixing job assignment into the breeding test.
Troubleshooting
Why Will Villagers Not Breed in Minecraft?
A failed breeder usually has one missing condition. Fix the smallest visible problem first and run the same test again.
There is no spare bed
Two adults can have beds and still fail to produce a baby if every valid bed is already claimed. Add one reachable spare bed, then wait and test again.
The roof is too low
A solid block above the pillow or a cramped route can make the bed invalid. Raise the ceiling and remove decorative blocks while testing.
One villager has no food
Throwing a stack near the door does not prove that both adults picked it up. Feed them separately and watch for willingness before changing the beds.
A cooldown is still active
After a successful birth, the adults need time. More food does not skip the cooldown, so keep the room stable and check again later.
A nearby village is interfering
Extra beds and workstations can make ownership hard to read. Move the test cell away from a village or remove nearby points of interest temporarily.
Transport was added too soon
Water, minecarts, and gates can block pathing. Prove one birth in a plain room before adding a collection line or sending babies to a hall.
Next steps
Use the New Baby for a Real Build
Keep breeding, transport, workstations, and iron production as separate tests so each failure has a clear cause.
Villager Trading Hall
Assign one workstation at a time, inspect offers, and lock a trade only after the villager reaches the correct cell.
Open trading hall guideMinecraft Iron Farm
Use a tested villager setup as the starting point for beds, workstations, golem spawning, and collection checks.
Read iron farm guideJava vs Bedrock
Compare edition behavior before you copy a breeder design from a tutorial made for a different platform.
Compare editionsPrimary references
Check Version Context Before You Scale
The guide separates stable setup advice from version-sensitive behavior. Use the source pages when a release changes village linking or bed rules.
Minecraft official articles
Use Mojang's current news and release pages for edition and update context before changing a long-running world.
Open official articlesMinecraft Wiki: Villager
Community-maintained reference for professions, beds, village points of interest, and villager behavior.
Review villager mechanicsMinecraft Wiki: Breeding
Community reference for willingness, food, breeding cooldowns, and the conditions for a baby villager.
Read breeding referenceFrequently asked questions
Minecraft Villager Breeding FAQ
How many beds do villagers need to breed in Minecraft?
Start with three valid beds for two adult villagers: one for each adult and one spare bed for the baby. The spare must be reachable, unclaimed, and have clear headroom above it.
What food makes villagers breed?
Bread, carrots, potatoes, and beetroot are practical breeding foods. Give enough items to both adults and watch that each villager can pick food up before you diagnose the beds.
Why do villagers show hearts but no baby appears?
Hearts followed by no baby usually point to a failed spare-bed check. Inspect the bed's reachability, whether another villager claimed it, and the open space above the pillow.
How do I breed villagers in Minecraft Java?
Use two adults, accepted food, and a reachable spare bed in an isolated test room. Java-specific pathing and nearby points of interest still matter, so test the design before adding a hall.
How do I breed villagers in Minecraft Bedrock?
Use the same core conditions, then pay extra attention to nearby beds, villagers, and village points of interest. Bedrock linking can make an apparently open bed belong to another villager.
Can I move baby villagers to a trading hall?
Yes, but prove one birth first and move the baby through a controlled boat, minecart, or safe route. Wait until it grows before assigning a workstation and locking a trade.
How long is the villager breeding cooldown?
A successful attempt creates a cooldown before the adults can try again. Treat the exact timing as version-sensitive, keep the room unchanged, and test again after waiting rather than adding random blocks.
Does a villager breeder need a job block?
No job block is required for the basic breeding test. Keep workstations out of the first room so you can diagnose food, beds, and pathing before adding trading-hall logic.